


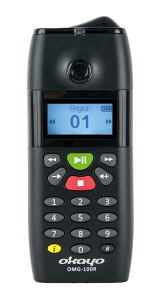
Okayo OMG-100
Instructions
User Manual

Audio Master 3
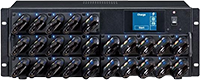
Okayo OMG-25C+
Okayo OMG-100 User Manual
1. Interface
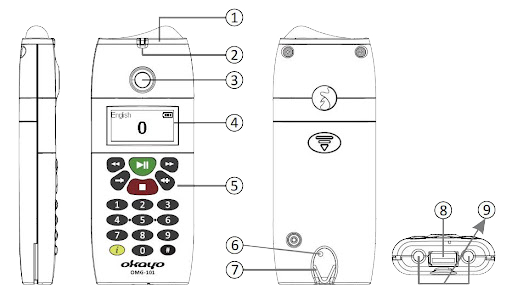
- Infrared Sensor
- Charging LED Indicator
- Hearing Aid Compatible Speaker (HAC*)
- Backlit LCD Screen
- Soft-touch Keypad
- Restore Factory Settings
- Lanyard Hole
- Charging/Uploading Port
- Headphone Jacks, 3.5 mm
* Users with hearing aids can listen to the speaker directly.
2. Powering On
- Press the ⏹ button to turn on the player.
- If
 appears, press both ⏹ and ⏯ buttons simultaneously to turn on the player.
⚠ Note
The players have a built-in battery, and before starting operation, ensure their batteries are fully charged.
3. Powering Off
- To turn off the player, press the ⏹ button for 10 seconds or place it in the charger. The anti-theft system remains active.
- To turn off the player and its anti-theft system, press both ⏹ and ⏯ buttons simultaneously for 3 seconds or place it in the uploaders.
4. Language Selection (01~32)
- After turning on the player, the screen appears
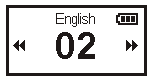
- Press the ⏪︎ or ⏩︎ button to select the language.
- Press the ⏯ button to confirm the selected language and exit the settings.
5. Changing Language (01~32)
- If you intend to change the language you are currently using, enter #1, then press the ⏯ button.
- The screen next to will appear. Press the ⏪︎ or ⏩︎ button to select the language.
- Press the ⏯ button again to confirm the selected language and exit the settings.
6. Playing an Audio Track (1~9999)
- Enter your preferred track number. Press the ⏹ button if you wish to change to a new number.
- Press the ⏯ button to play the track.
- Press the ⏪︎ or ⏩︎ button to fast forward or rewind the track.
- If necessary, press the ⏯ button again to confirm the selected language and exit the settings.
- If necessary, press the ⏹ button to stop the track.
⚠ Note
The track will play automatically without pressing a button when the "Auto-play function" is enabled by Audio Master 3.
7. Volume Adjustment
- Press the 🔈︎− or 🔈︎+ button to adjust the player's volume.
- Once your preferred volume is set, leave it for 1 second, and the player will automatically exit the setting.
8. "i" Button
- Press the ⓘ button when the player is on.
- The screen will appear.
- If necessary, create your own page using Audio Master 3.
9. Check Settings
- To check the player's settings, press the ⓘ and ⏹* buttons simultaneously when the player is off.
- The
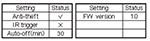 screen below will appear. Press the ⏪︎ or ⏩︎ button to turn the page.
 - To exit this screen, press the ⏹ button, and the player will turn off again.
* If the player was turned off by simultaneously pressing both ⏹ and ⏯ buttons, the ⓘ, ⏹ and ⏯ buttons should be pressed at the same time.
Audio Master 3 - Audio Content Compiler
1. System Requirements
- Microsoft Windows 7: 32-bit SP2 or 64-bit
- Microsoft Windows Vista: 32-bit or 64-bit
- Microsoft Windows XP: 32-bit SP2 or SP3
- Microsoft Windows 7/Windows Vista: Intel Pentium 4 2GHz or higher
- Microsoft Windows XP: Intel Pentium III 1GHz or higher
- Microsoft Windows 7/Windows Vista: 1GB RAM or more
- Microsoft Windows XP: 512MB RAM or more
- 500MB Hard Drive
- Microsoft Windows 7/Windows Vista: 16 bit or (65000 colors)
- Microsoft Windows XP: 16 bit or (65000 colors)
2. Program Configuration
(Figure 1)
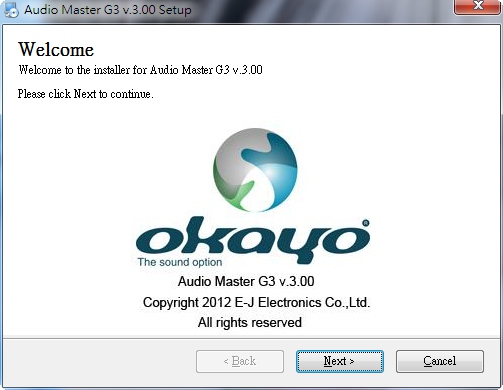
(Figure 2)
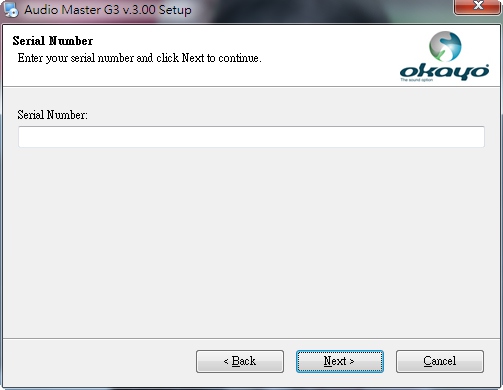
(Figure 3)
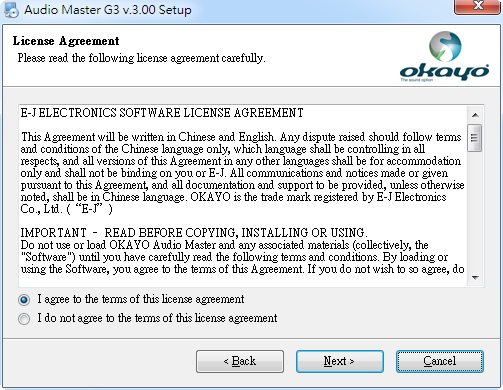
(Figure 4)
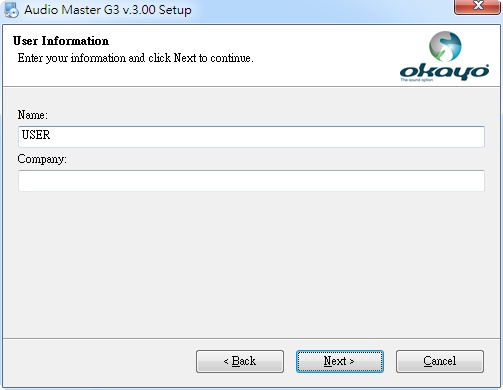
(Figure 5)
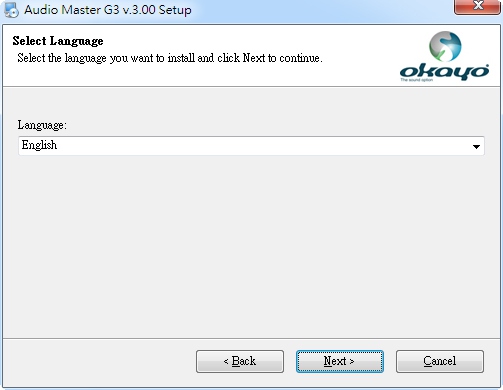
(Figure 6)
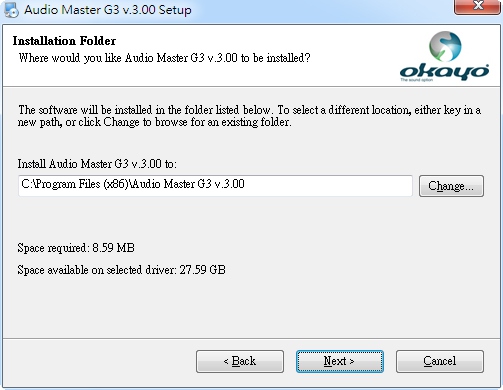
(Figure 7)
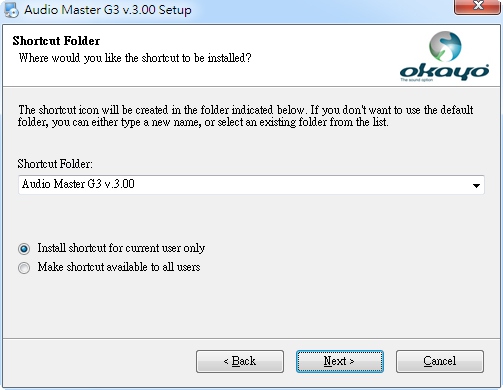
(Figure 8)
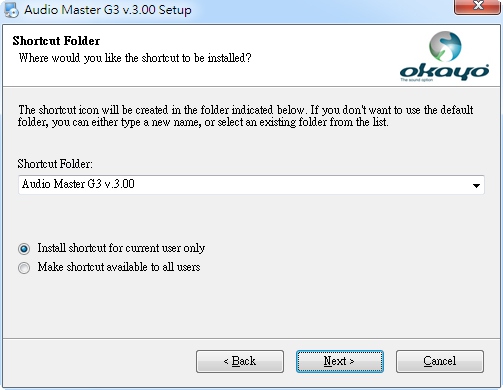
(Figure 9)
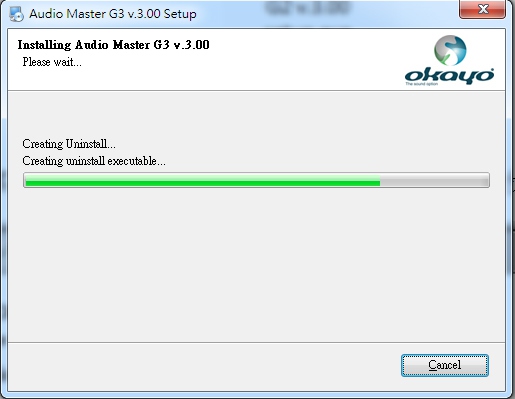
(Figure 10)
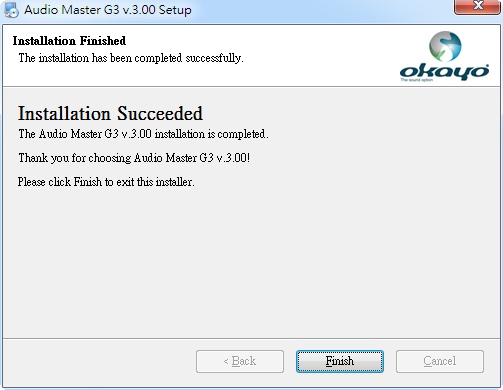
(Figure 11)
(Figure 12)

(Figure 13)
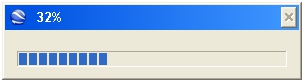
(Figure 14)
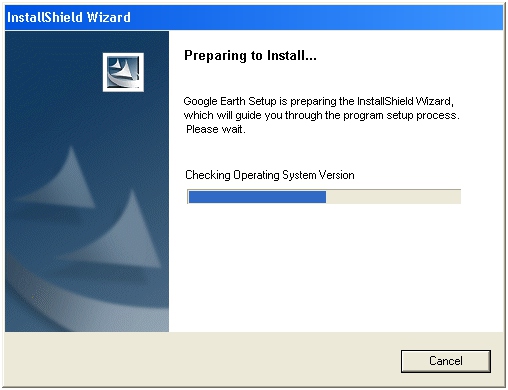
(Figure 15)
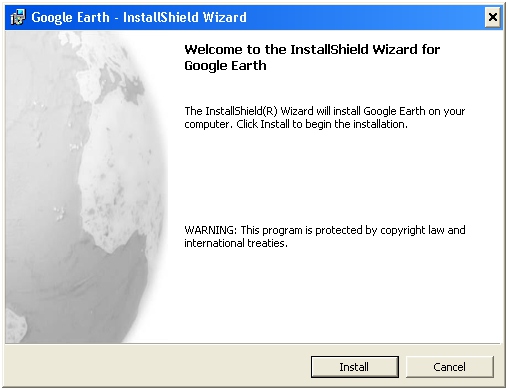
(Figure 16)
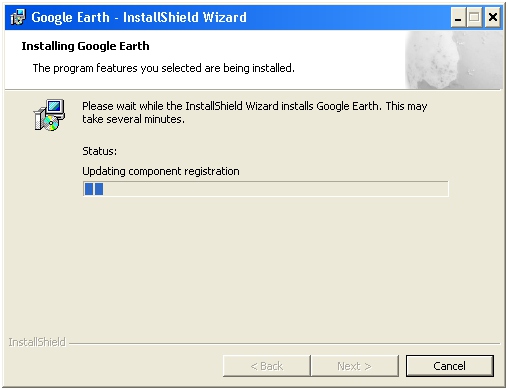
(Figure 17)
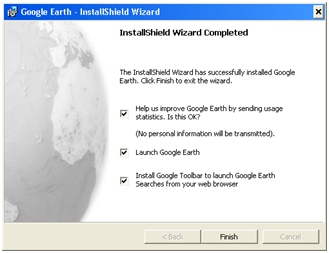
(Figure 18)
(Figure 19)
2. Operations
(Figure 20)

(Figure 21)
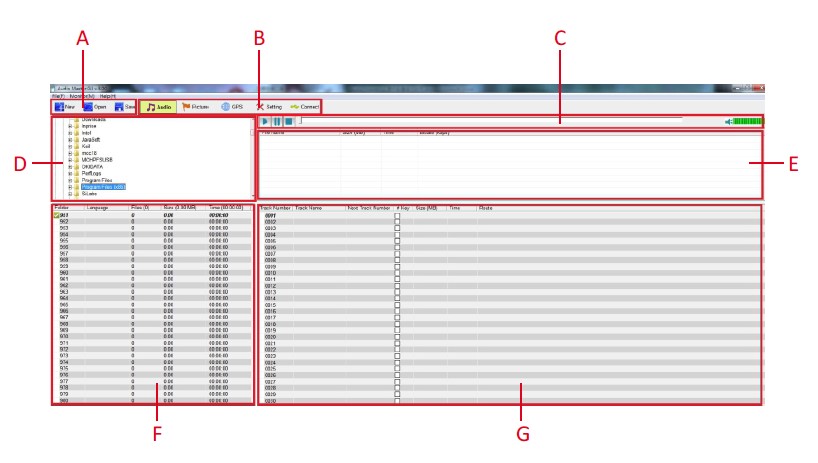
(Figure 22)
- Project Management Zone
In this zone, you can create, open, modify, or save projects. - Manage Functions by Category
- Audio – click this tag to manage all audio files.
- Image – click this tag to manage all image files.
- GPS — click this tag to manage the GPS location of each audio content.
- Settings – click this tag to set all auxiliary settings.
- Connect – click this tag to upload audio content to the audio guide.
- Audio File Monitor
To play and verify the selected audio file in real-time. - Route Explorer
For quick searching of audio sources. - Source Audio Folder Summary
Present all available audio files from the target folder for content compilation. The compatible audio format should be MPEG1 Layer 3 with a bitrate of < 128 kbps. - Target Language Folders
32 language folders are available, from 951 to 982. - Target Folder Programming Zone
There are 9999 audio tracks available in the audio guide, in each language folder, with numerical codes from 0001 to 9999.
Create a new project:
Click "New" to create a new project, as shown in Fig. 22-1
(Figure 22-1)
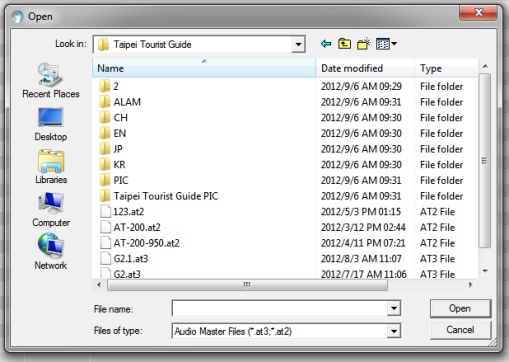
Click "Open" to access an existing project, as shown in Fig. 22-2. Select the desired project from the list, as shown in Fig. 22-3.
(Figure 22-2)
(Figure 22-3)
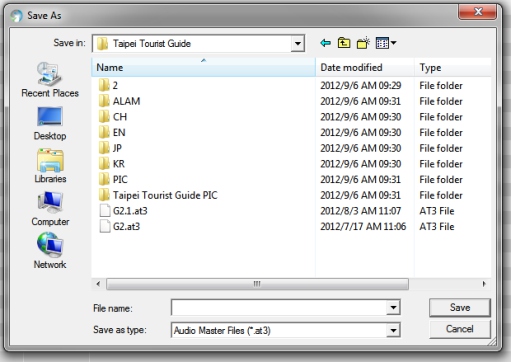
Click "Save" to save your project after audio compilation is complete, as shown in Fig. 22-4. Give the project a filename and save it, as shown in Fig. 22-5.
(Figure 22-4)
(Figure 22-5)
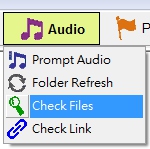
Click "Check Files" (as shown in Fig. 22-6) to check if all audio files assigned to the respective languages are available or not. A notification (as shown in Fig. 22-7) will appear if any audio file does not exist or is missing. An exclamation mark can be seen next to the numerical code, as shown in Fig. 22-8.
(Figure 22-6)
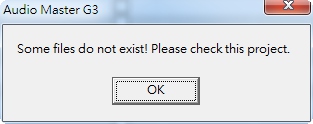
(Figure 22-7)

(Figure 22-8)
Click the selected language folder, say 951, and drag/double-click the desired audio files from the Source Folder Summary to the Target Folder Programming Zone, as shown in Fig. 23.
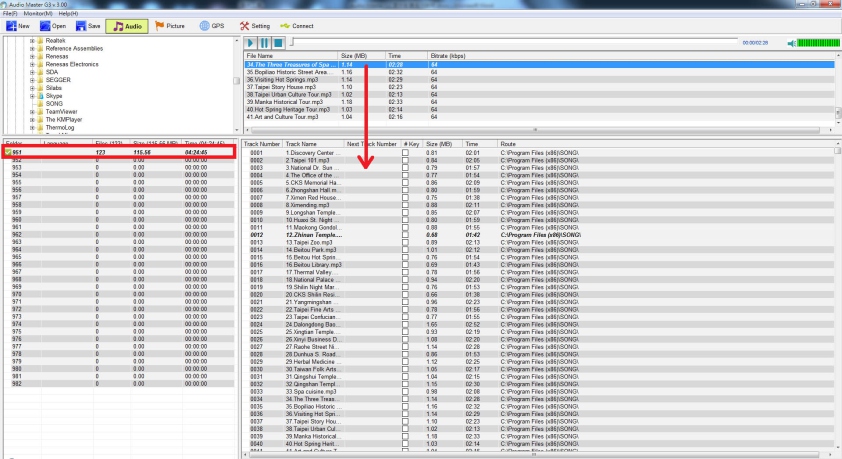
(Figure 23)
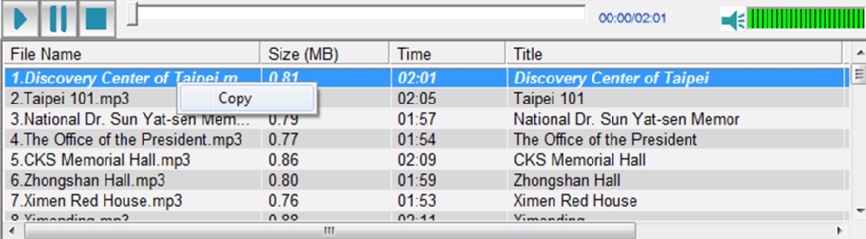
(Figure 23-1)
Click the audio file you want to monitor, then click the play icon to listen to the audio content, as shown in Fig. 23-2.
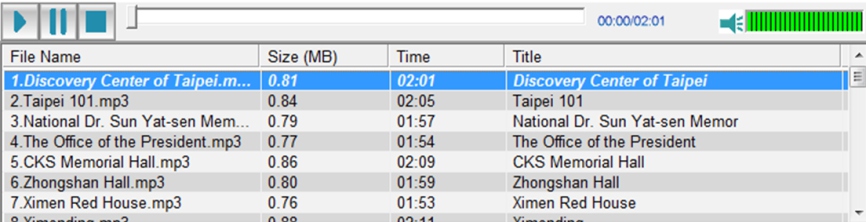
(Figure 23-2)
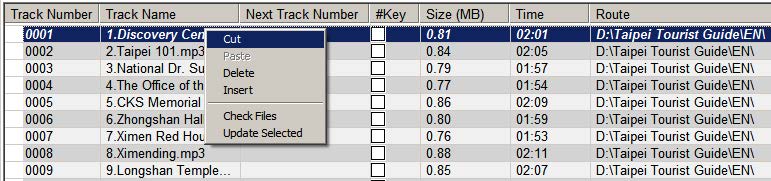
(Figure 23-3)
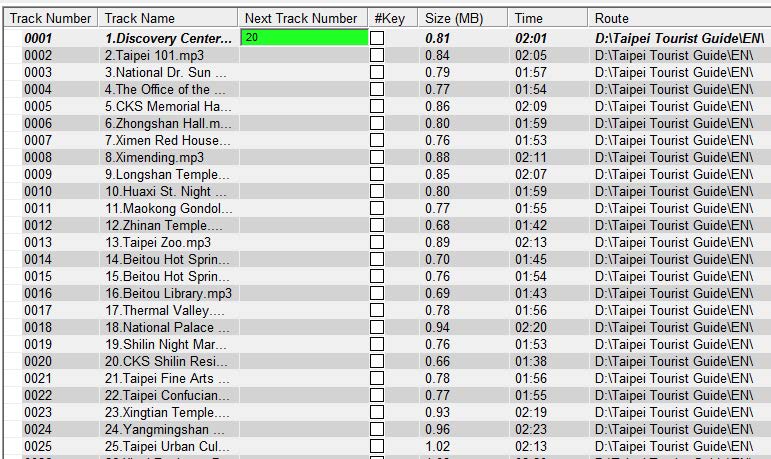
"Next Track Number" is designed specifically for tour planners to suggest a linear route. You can enter the next track number for any other available audio track. For example, by entering "20" for the next audio track number following audio track number 0001, as shown in Fig. 24, users can access audio track number 0020 when they press the Play button after track 0001 finishes playing.
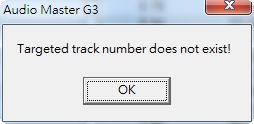
Any number entered for "Next Track Number" must actually be available in the list, otherwise an error message will appear, as shown in Fig. 24-1.
(Figure 24)
(Figure 24-1)
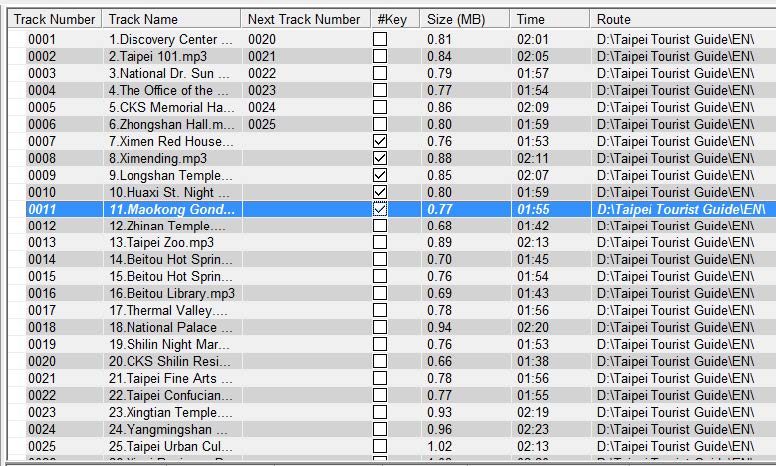
A second-level audio track can be accessed at any time by pressing the "#" button. While audio is playing, users can press the # key to exit their current location and then listen to a new audio track. When the new audio track is ready or the user wants to leave it, they can press the # key again to return to their original location.
Only the track number that has been clicked in the column with the # key can be executed using the # key, as shown in Fig. 24-2.
"Next Track Number" and "# key" cannot coexist.
(Figure 24-2)
An audio prompt is helpful for users to determine whether the numerical code they entered is correct or not. Select "Prompt Audio" under the "Audio" tag, and a programming sheet will appear at the bottom. Follow the same procedure (as shown in Fig. 25) you learned earlier to move audio files from the source folder summary to the Prompt-Audio programming sheet.
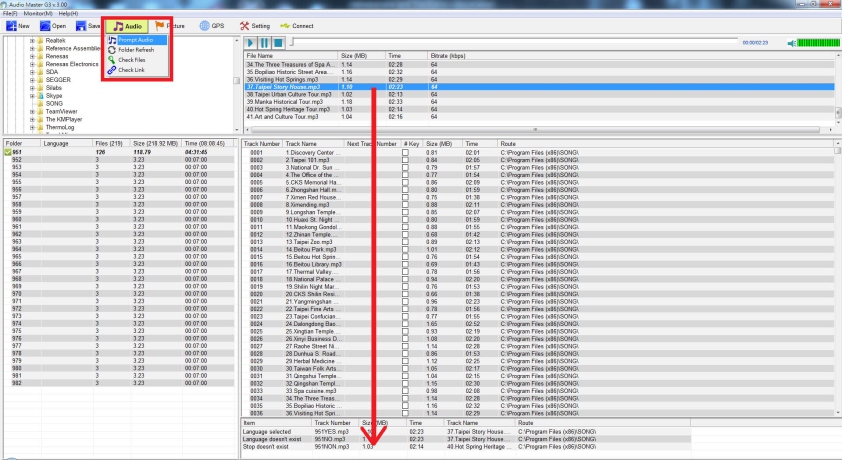
(Figure 25)
Move the arrow to the desired language with the right mouse button, then you can set it as the default language, as shown in Fig. 25-1. A tag will appear next to the selected language, as shown in Fig. 25-2.
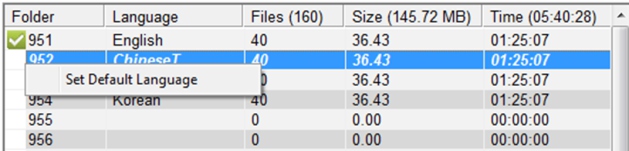
(Figure 25-1)
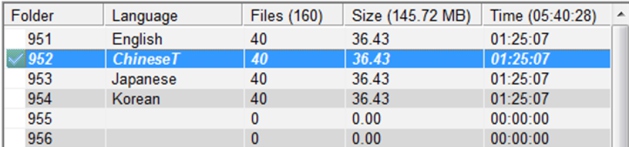
(Figure 25-2)
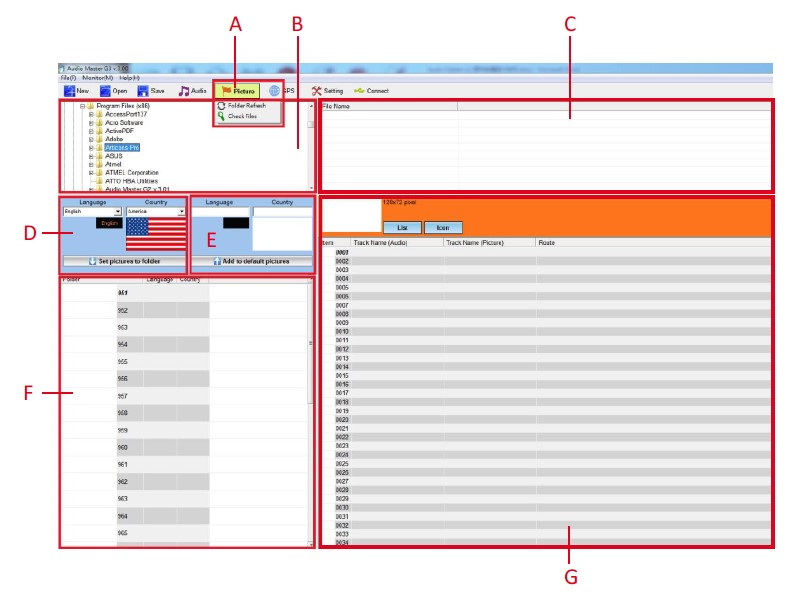
(Figure 25-3)
- Manage and compile image files
After clicking "Image", a drop-down menu will appear with various function tags for further image management. - Route Explorer
For quick exploration of image files. - Source Image Folder Summary
Present all available images from the target folder for content compilation. Compatible images should be in BMP or JPG format. - Language and Flag Data Bank
By default, 11 languages and flags are available in the data bank. Only these languages and flags in the data bank can be set as the target language folder. - Add new languages and flags to the data bank
- Target Language Folders
32 language folders are available, from 951 to 982. - Target Folder Programming Zone
Drag the desired images to the appropriate audio track, from numerical code 0001 to 9999. Assign images to the appropriate audio tracks by dragging them; proceed in the same way as when compiling audio files, as shown in Fig. 26. Images should be in BMP and JPM format. The maximum size of each individual image should be 128 x 72 pixels.
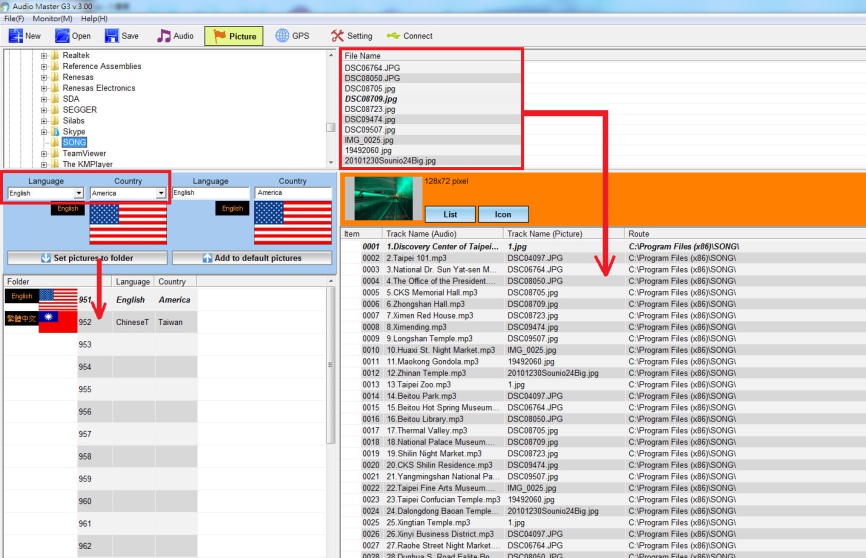
(Figure 26)
Create new languages and flags
- Enter language in A, as shown in Fig. 26-1.
- Enter country in B, as shown in Fig. 26-1.
- Double-click with the left mouse button in C; you can select the desired flag from the source files, as shown in Fig. 26-2.
- By clicking "Add to default images"; you can then find it in the language and flag data bank. Set it to the target folder as you wish, as shown in Fig. 26-3.
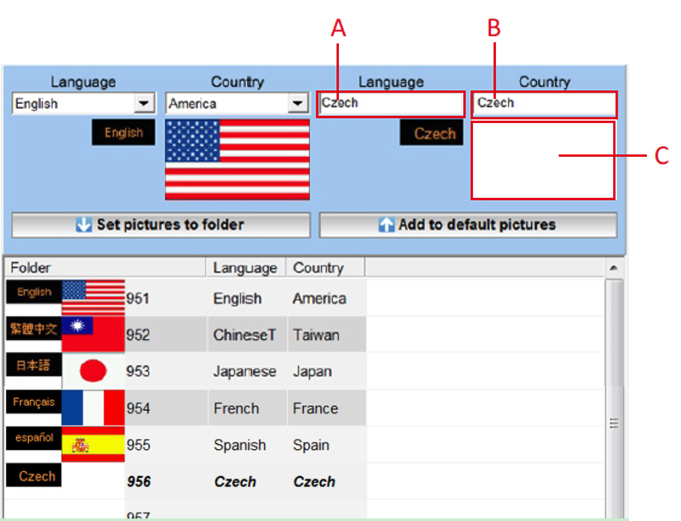
(Figure 26-1)
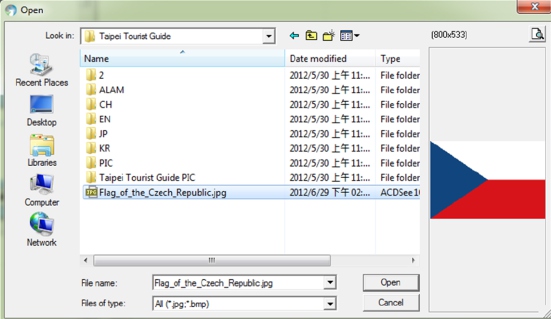
(Figure 26-2)
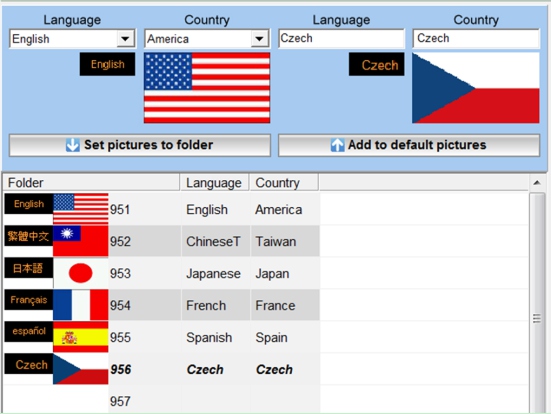
(Figure 26-3)
GPS Location Configuration
- Enter a specific location
Click "search" after entering a specific address or location name. - Enter GPS data
Latitude and longitude can be edited directly to search for locations. - Location List
This is the list of locations that has been edited.
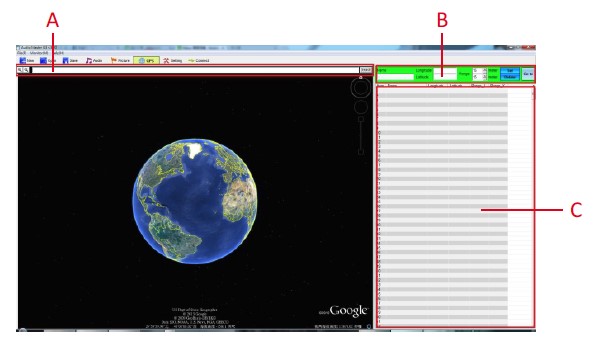
(Figure 26-4)
- Enter a specific address or location name.
- Click "Search", and the location image will appear below.
- This is the location image after searching.
- Here you can also set the location name, latitude and longitude, and distance range. The minimum range is 15 meters. However, since there is a tolerance of 5 meters, ensure that the distance between 2 locations is greater than 20 meters.
- After editing all location data in step 4, they will be displayed below after clicking "Set".
- Each item number in the list refers to each track number. For example, track number 0001 will play the audio content of item 1 in the list.
- If you want to know a specific location in the list, simply select one, then click "Go to", and you will see the location image on the left.
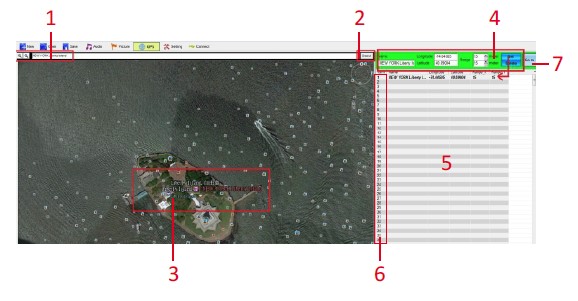
(Figure 26-5)
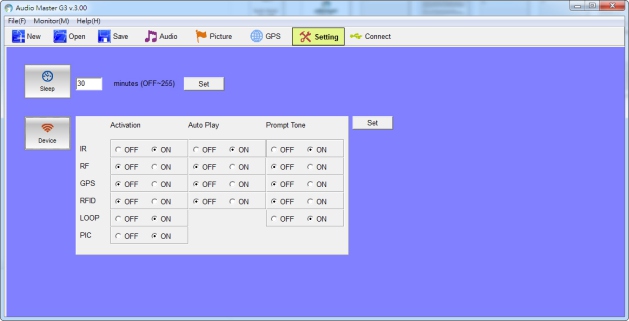
(Figure 27)
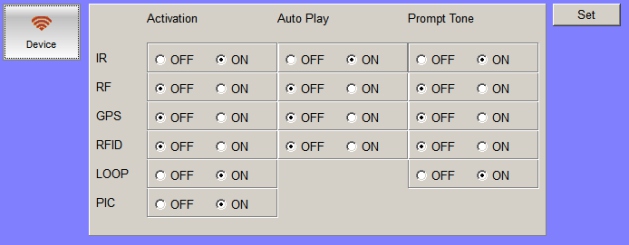
Define the automatic power-off time for the audio guide when not in use. The default power-off time for the audio guide is set to 30 minutes, meaning the audio guide will automatically turn off if not used after 30 minutes. Fig. 27-1 provides a good example. When set to OFF, it means the audio guide will NOT automatically turn off until the battery runs out. You must click "Set" to finalize and fix the power-off time setting.
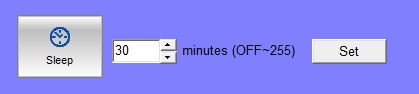
(Figure 27-1)
(Figure 27-2)
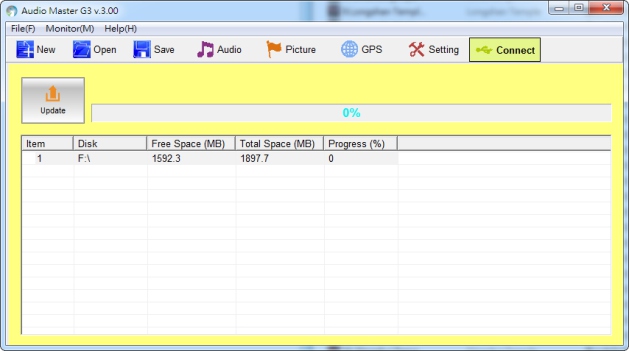
(Figure 28)
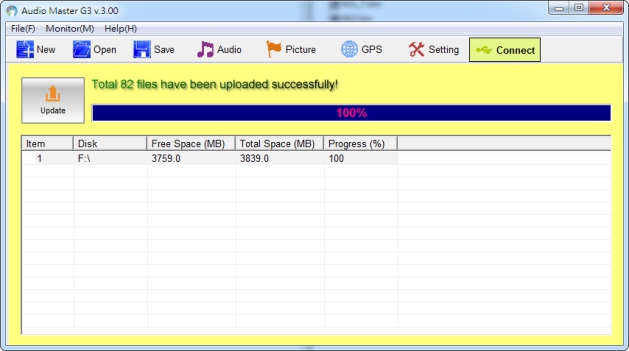
(Figure 28-1)
Okayo OMG-25C+ — Desktop Charger
1. Interface
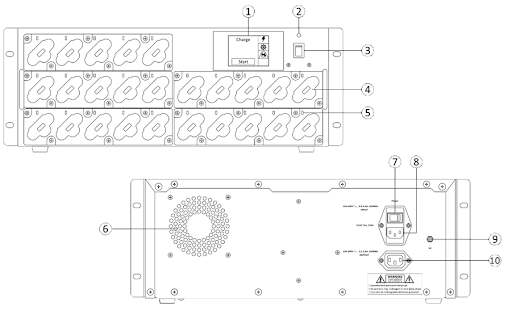
- 2.8” Touch Screen
Charging Mode
Settings Mode
Programming Mode - Power Indicator
- DC Power Switch
- Charging Slot
- Status Indicator
Blue light: player is correctly inserted into the slot.
No LED: player is not correctly inserted into the slot. - Fan
- AC Power Switch
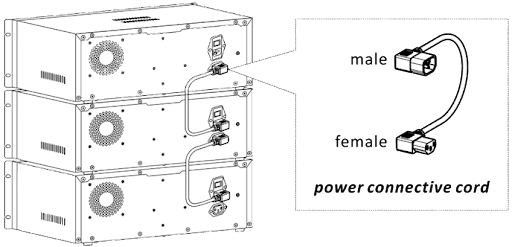
- Power Input
- Grounding
- Power Output
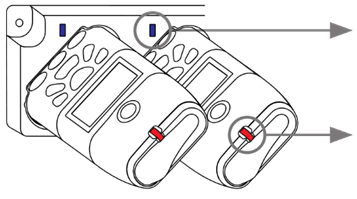
Charging Slot
Indicators light up blue
LEDs on the device
Red: charging
Green: fully charged
Flashing red: Error - potential player battery fault
No LED: player is not correctly inserted into the slot
2. Operations
Powering On
Connect the supplied power cable to the mains. Turn on AC and DC power.
Charging Mode
Press "Start" to charge and "Stop" to stop charging.
Settings Mode
- Press the ⚙︎ icon to enter "settings" mode.
- Select the desired language (LG) and defined channel¹ (CH) using ▲▼. ¹Channel selection is only available for OMG-100T/R.
- Press the "Set" button to program.
Programming Mode (applies to using a model other than OMG-100)
- Press the
 icon to enter "programming" mode.
 - Mode 1 screen will appear. Select the route type (see table below), then press the Set button to program.
| Route Type | OMG-100T | OMG-100R |
|---|---|---|
|
Audio Tour |
Player |
Player |
|
Live Tour |
Live |
Listen |
|
Guided Audio Tour |
Guide |
Listen |
|
Multilingual Audio Tour |
Leader |
Guest |
|
2 Speakers |
Lecture (M/S) |
Listen |
If a custom mode selection is preferred, press the icon again to display the Mode 2 screen.
- OMG-100T: Player, Guide, Leader, Live and Lecture
- OMG-100R: Player, Guest and Listen
Select the appropriate mode using ▲▼, then press the "Set" button to program.
Powering Off
Turn off the DC power from the front. The charger is now off.
3. Multi-Charger Installation
- Below is how to connect and expand chargers on demand.
- A maximum of 3 chargers can be connected simultaneously.
4. Technical Specification
| Parameter | Value |
|---|---|
|
Charging Pockets |
25 |
|
Charging Current |
650±30 mA |
|
Charging Time |
4 - 5 hours |
|
Power Input |
AC 100-240 V, 50/60 Hz, 4.8-2.4 A |
|
Power Output |
AC 100-240 V, 50/60 Hz, 3.2-1.6A |
|
Operating Temperature |
0 ~ 40°C |
|
Dimensions (L x W x H) |
236 x 484 x 177 mm |
|
Weight |
8.5 kg |