

Okayo EZtour
Instructions
User Manual
Okayo EZtour C12 and C24
Okayo EZtour User Manual
1. Models
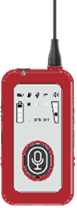
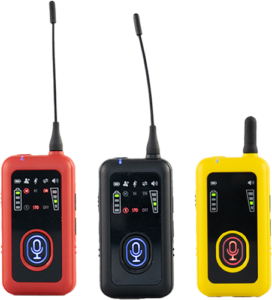
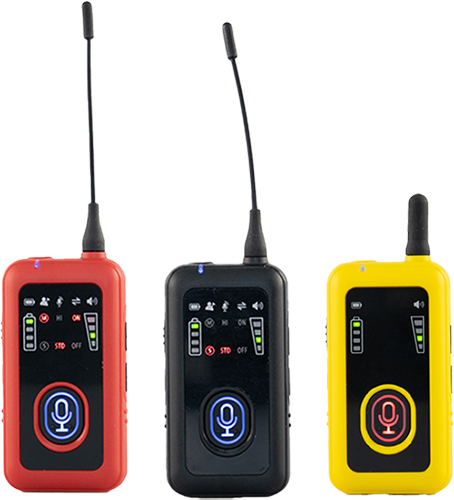
Master (M)
Model: ET-30T
Housing Color: Red

Sub-Master1 (S)
Model: ET-31T
Housing Color: Black

Receiver (R)
Model: ET-30R
Housing Color: Yellow
1 Sub-Master operates only when a Master is present.
2. Interface
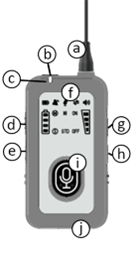
- Antenna
- 3.5 mm Microphone Jack (TRRS)
- Signal Indicator
- Function Button
- ⏻ Button
- + Button
- - Button
- Illuminated Talk Button
- USB-C Charging Port
3. LED / Signal Indicator
| Status | Master | Sub-Master | Receiver |
|---|---|---|---|
|
Blue |
Full Power |
||
|
Red |
Low Power |
||
|
Solid |
Device is on |
Device is on and properly paired |
|
|
Flashing Slowly |
- |
Device is on but not paired with other devices |
|
|
Flashing Rapidly |
Pairing or searching for a new channel |
Device is on and searching for its Master device |
|
|
Off |
Device is off or settings are being adjusted |
Device is off |
|
4. Talk Indicator

Blue.
Your microphone is on.

Red.
You are muted.

No illumination.
You do not have talk capability.
5. Battery Charge Indicator
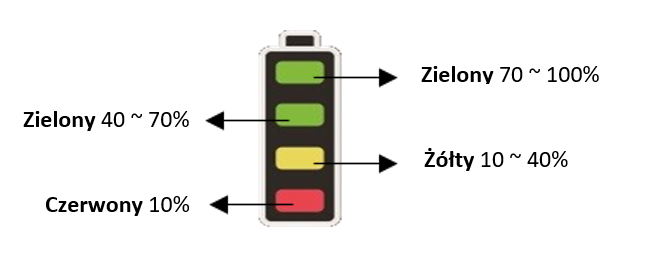
⚠ Battery Warning
- Fully charge the devices before first use.
- Charge the device when the battery level is below 50%.
- Before long-term storage of the devices, ensure the battery capacity is at 50% and charge the devices every 3 months.
- Stop using the device if you notice overheating or battery damage. Contact your dealer.
6. Low Power2
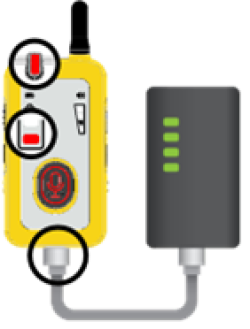
Charge3 the device as soon as possible when low power signals appear (red LED/battery indicators).
2 If low battery occurs during a tour, the device can be recharged via a PowerBank.
3 Proprietary charging stations are available.
7. Let's Start the Tour - Step-by-Step Instructions!
STEP 1. Turn on the Master device before the tour
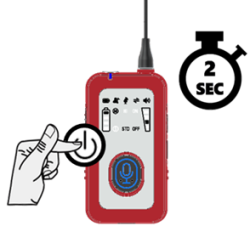
Press and hold the power button ⏻ for 2 seconds to turn on the device.
STEP 2. Adjust microphone sensitivity4 and activate or deactivate the Talk Back function5
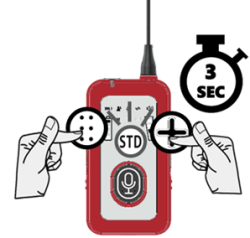
- Press and hold the function button and the + button on the Master device for 3 seconds until the "STD" or "HI" symbol (depending on the setting) starts flashing.
- Adjust the setting using the + and - buttons, then press the function button to confirm. The "OFF" or "ON" symbol (depending on the setting) (Talk Back6) will start flashing.
- Select "ON" or "OFF" (activate or deactivate) using the + and - buttons, then confirm/exit by pressing the function button.
4 Sub-Master can adjust microphone sensitivity by following the same instructions.
5 The "Talk Back" function is not available for Sub-Master.
6 Ensure that receivers are within range of the Master when the "Talk Back" function is activated.
Talk Back Function:
- when "ON" is displayed - transmission function enabled in receivers. Recipients can send a return message.
- when "OFF" is displayed - transmission function disabled in receivers. Recipients can only listen.
Microphone Sensitivity:
- when "HI" is displayed - high microphone sensitivity. This mode is recommended in places where silence is required (whispering).
- when "STD" is displayed - standard microphone sensitivity. This mode is recommended in environments where there is any ambient noise.
STEP 3. Create your group (pairing)
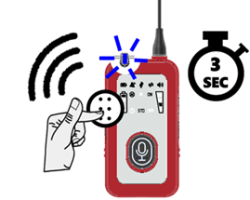
- Press and hold the function button for 3 seconds until the signal indicator on the Master device starts flashing.
- Then turn on the Sub-Master device and receivers. The LEDs will light up blue.
- On the Master device, briefly press the function button to complete pairing.
STEP 4. Adding participants to the group (pairing additional receivers) during the tour
Same as in STEP 3.
⚠ Note
Only the Master can add group members (pair receivers).
STEP 5. Changing the channel in all receivers during the tour
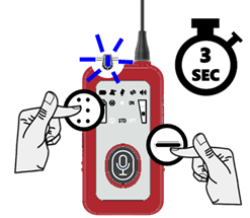
Change the channel when the Sub-Master device and receivers are not receiving audio from the Master device smoothly.
- Press and hold the function button and the - button for 3 seconds until the LED on the Master device starts flashing.
- The LEDs on the Sub-Master device and receivers will start flashing.
- You can continue the tour when the LEDs on all devices stop flashing.
STEP 6. Remote tour termination
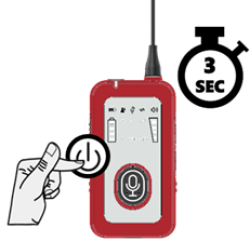
On the Master device, press and hold the power button ⏻ for 3 seconds to turn it off. The Sub-Master and receivers will be remotely turned off.
Okayo EZtour C12 and C24 User Manual
1. General Operations
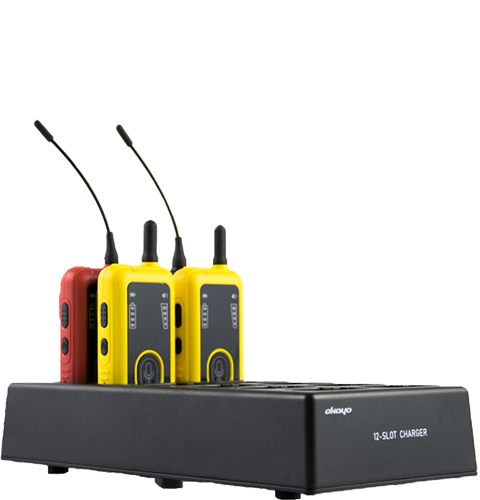
STEP 1. Connect the supplied power adapter to the charger and electrical outlet.
STEP 2. Insert the Okayo EZtour devices into the charger. Note! Okayo EZtour devices will automatically turn off when placed in the charger.
STEP 3. The LEDs on the Okayo EZtour devices will light up red, indicating charging status.
STEP 4. The Okayo EZtour devices will be fully charged when the LEDs change to blue.
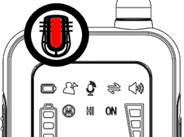
Red
Charging in progress
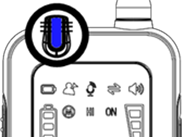
Blue
Device fully charged
2. Troubleshooting
Q: Why are the LEDs on the Okayo EZtour devices not lighting up?
A: The Okayo EZtour devices are not properly inserted into the charger. Remove them and reinsert.
Q: Why are the LEDs on the Okayo EZtour devices flashing?
A: Potential malfunction of the Okayo EZtour batteries. Contact your supplier for assistance.
3. Technical Specifications
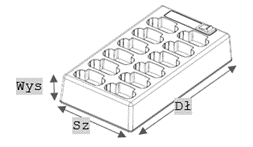
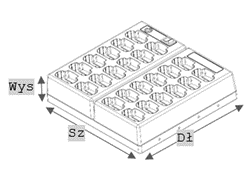
| Okayo EZtour C12 | Okayo EZtour C24 | |
|---|---|---|
|
|
|
|
|
Number of Charging Slots |
12 |
24 |
|
Charging Connector |
USB-C |
USB-C |
|
Charging Time |
4 ~ 6 hours |
4 ~ 6 hours |
|
Power Input |
100 ~ 240 V AC, 50 ~ 60 Hz |
100 ~ 240 V AC, 50 ~ 60 Hz |
|
Power Output |
5 V DC, 4.0 A, 20 W |
12 V DC, 5.0 A, 60 W |
|
Dimensions (W x H x D) |
11.5 x 4.6 x 21.8 cm |
23.1 x 6.4 x 21.8 cm |
|
Weight (with adapter) |
0.48 kg |
1.59 kg |