


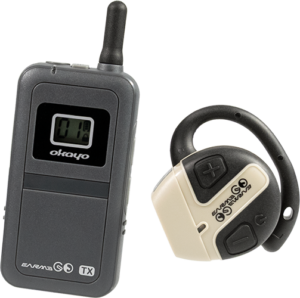
Okayo EarME GO
1. Create your group (allowing two transmitters to talk simultaneously)
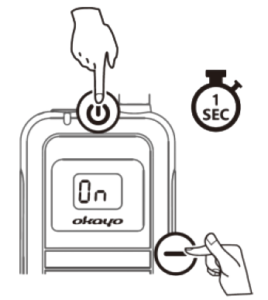
Select a transmitter as master. Press ⏻ and – simultaneously to start pairing. The channel number will start flashing.
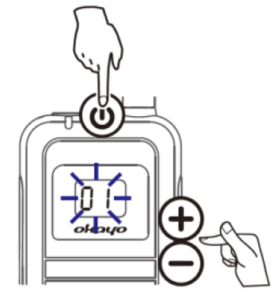
Select a channel using + or – and confirm by pressing ⏻ or do not press anything (the channel will be confirmed automatically). The LED will flash.
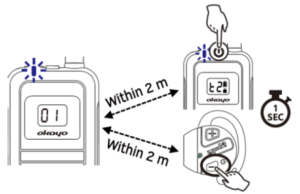
Press the ⏻ button on another transmitter, if necessary, and on the receiver(s) to turn it on. The transmitter is paired when t2 appears on the display. The receiver(s) are paired when the flashing LED changes to solid.
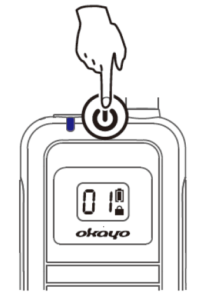
Briefly press ⏻ on the master to finish pairing and start the tour!
* The second transmitter is muted, briefly press ⏻ to speak.
2. Subsequent Use
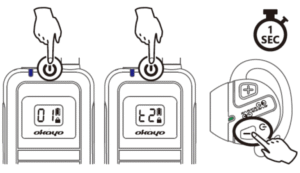
Press ⏻ to turn on the transmitter* and receiver(s) if no change has occurred in the group settings.
* The first transmitter turned on is the master transmitter.
3. General Settings
Mute Microphone
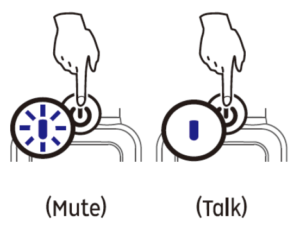
Briefly press ⏻ to mute, then briefly press ⏻ again to speak.
The LED flashes when the microphone is muted.
Adjust Microphone Gain
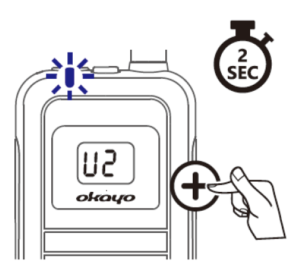
Press + to adjust the microphone volume within the range AU ~ U5.*
* Available for external audio when set to AU, the microphone is muted.
Adjust Volume
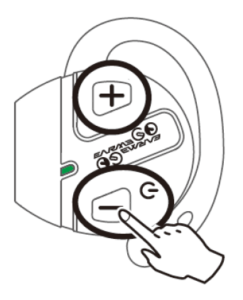
Press + or – to adjust the volume level.
LED Status
| Status | Transmitter | Receiver |
|---|---|---|
|
Full Power |
Blue |
Green |
|
Low Power |
Red |
|
|
Pairing Process |
Flashes rapidly |
|
|
Signal transmitted / received |
Solid |
|
|
Muted |
Flashes slowly |
– |
Battery Status (transmitter)
| Battery charge percentage | Symbol on display |
|---|---|
|
> 50% |
|
|
< 50% |
|
|
Low |
|


4. Join a group during the tour!
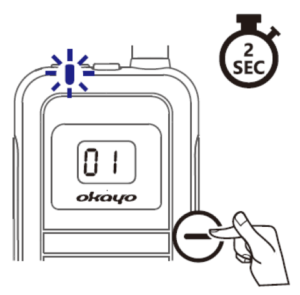
Press the – button on the master to enter pairing during the tour. The LED will start flashing.
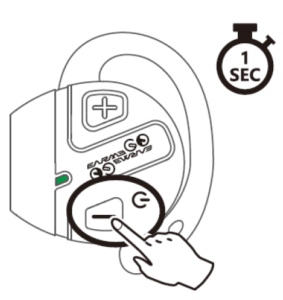
Press the ⏻ button on the additional receiver to turn it on. The receiver is paired when the flashing LED changes to solid.
* If there is only one transmitter in the group, the second transmitter can also join.
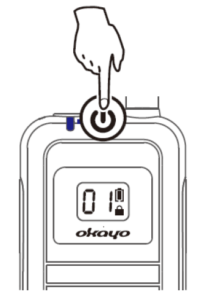
Briefly press the ⏻ button on the master to finish pairing and start the tour!
5. Change to a new channel
Recommended if interference occurs.
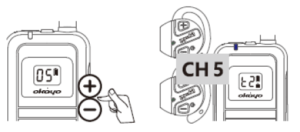
Press + and – simultaneously to unlock the master. The 🔒︎ symbol will start flashing. Select a channel using the + or – buttons. Wait 1 second, and the new channel will be confirmed. All receivers and (optionally) the second transmitter will switch to the new channel accordingly.
6. Automatic Group Shutdown
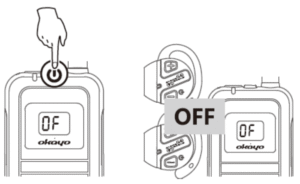
When the master unit is turned off, all receivers and (optionally) the second transmitter will automatically turn off.
7. Checking battery with receiver off
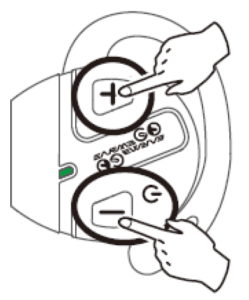
| Battery Status | LED Status |
|---|---|
|
75% ↑ |
Solid green |
|
50% ~ 75% |
Flashing green |
|
25% ~ 50% |
Flashing green and red |
|
25% ↓ |
Solid red (30 min remaining) |
8. Battery Saving
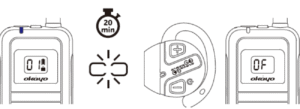
Receivers and (optionally) the second transmitter automatically turn off after 20 minutes without signal reception.
9. Advanced Settings
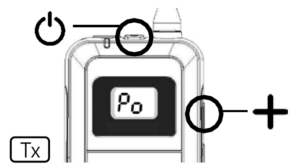
Before starting to work with the group, you can adjust the settings according to your preferences.
- Press and hold the ⏻ and minus (–) buttons simultaneously to start transmission.
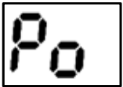
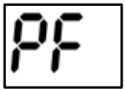
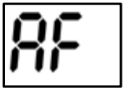
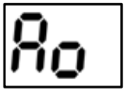
- Each setting will appear in a sequence as shown in the table below.
- Each setting can be adjusted using the plus (+) and minus (–) buttons, and the selected value is confirmed / the setting is exited using the ⏻ button.
- The transmitter will start and enter standby mode automatically after all settings are adjusted.
| Display Information | Function (underlined default setting) |
|---|---|
|
|
Radio power (high (Hi) / low (Lo)): |
|
|
Remote shutdown (on (On) / off (Off)): |
|
|
Automatic shutdown (on (On) / off (Off)): |
|
|
Automatic power-on (on (On) / off (Off)): |
⚠ Battery Warning
- Regularly charge the device when the battery level drops below 50%.
- Before long-term storage, ensure the device is fully charged.
- Discontinue use of the device if it overheats or the battery malfunctions/operates incorrectly.
- Contact your supplier for further inspection or battery replacement.