


Maytel Grand Multicom Pro 2.4G
1. Basic Information
1.1. Description
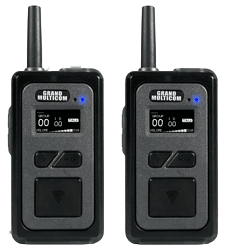
"GRAND MULTICOM-PRO" is the most advanced multiplex communication equipment, providing simultaneous hands-free communication for up to 10 users. It supports an unlimited number of Any-one and Listen-only participants. "GRAND MULTICOM-PRO" can increase call range and minimize the impact of obstacles without the aid of any external device; supported in 4 modes. It combines reliable performance, quality, and versatility in a compact and easy-to-use package thanks to state-of-the-art technology.
1.2. Main Features
- Supports 4 professional operating modes and directly selects the mode optimized for the environment in which it is used.
- 9 fixed users + Any number of participants can directly talk in a group with a microphone headset simultaneously, while other members listen.
- Crystal clear audio quality, sufficiently loud sound, and super dynamic noise reduction above 95 dB.
- Sufficiently long communication distance provided by 4 professional operating modes that can be selected directly in the field.
- Individual PIN encryption can be set for each group, and the group number and ID are displayed on a clear and legible OLED display.
- Design fully compliant with IP67 waterproof and dustproof requirements, including a strong and durable casing.
- Convenient drop-in and USB charging system.
- Efficient method for battery replacement and detachable antenna.
2. Illustration and Description
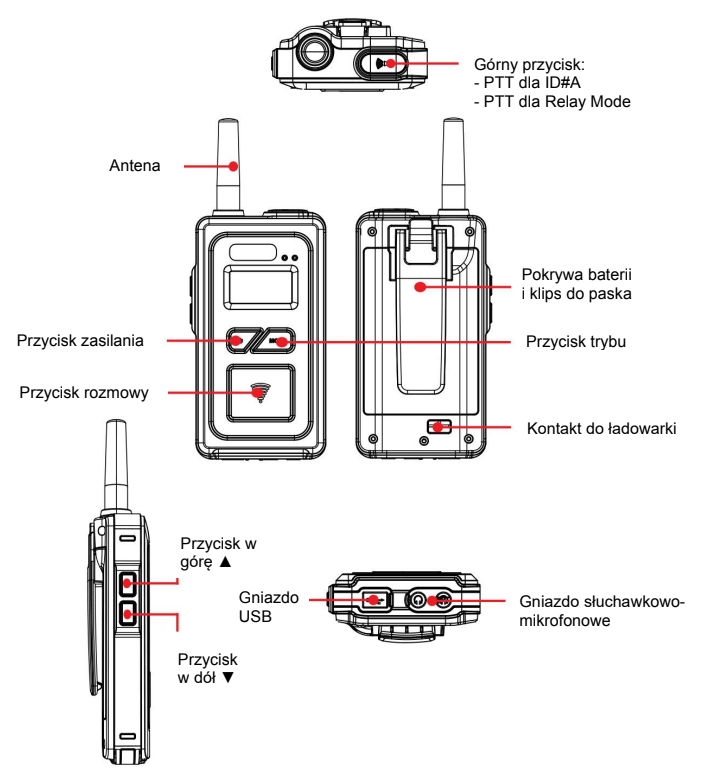
|
Device Element |
Function |
|---|---|
|
1. Power Button |
Press and hold the power button for more than 2 seconds to turn the device on/off. |
|
2. Mode Button |
Select group number, ID number, listen-back path level, microphone sensitivity level, PIN number; used to select 4 operating modes. |
|
3. Up Button |
Increase volume level, select group number, ID number, etc. in each mode. |
|
4. Down Button |
Decrease volume level, select group number, ID number, etc. in each mode. |
|
5. Talk Button |
Turn mute on/off. |
|
6. Top Button |
PTT button for ID#A and for Relay mode / Used to select 4 operating modes. |
|
7. Headphone-Microphone Jack |
2x 4-pin 3.5 mm jack (TRRS) |
|
8. Antenna |
Detachable antenna. |
|
9. USB Socket |
USB port for software updates and battery charging. |
|
10. Drop-In Charger Contact |
Charging contact for the battery. |
3. Operation
3.1 Power On / Off
Press and hold the power button for more than 2 seconds to turn the device on/off.
3.2 Increasing / Decreasing Volume Level
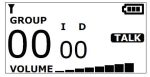
- Press the + button to increase the volume and the - button to decrease the volume after turning on the device.
- The display initially shows the default volume level 03.
- Volume adjustment is available in the range of 0 - 8.
3.3 Group Selection
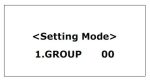
- Press and hold the MODE button until "Setting Mode" is displayed. Select the group number 00-39 for the 2.4 GHz version you wish to operate on by pressing the + or - button.
- Press and hold the MODE button again to exit the settings panel. The device remembers the selected group.
3.4 ID Selection
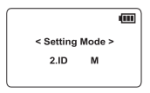
- Within a group, each device must have a different ID number from M, A, S, L, 01 to 09 (M, A, L, 01 to 08 in Repeater mode).
- ID M becomes the master device in the group; each group must have a device with ID M (without it, communication is impossible).
- IDs: #M, #S, #01 to #09 allow simultaneous hands-free reception and transmission within the group (full conversation).
- ID A is supported in PTT (push-to-talk) mode – an unlimited number of devices can use this ID. If you press the top button while another user with ID#A is speaking, an alert will appear, and transmission will not be activated. You must wait until the line is clear.
- ID#L is for reception only (no transmission capability). A and L IDs can be assigned to an unlimited number of devices in a group.
- Press and hold the mode button on the powered-on device until "Setting Mode" appears. Briefly press the mode button to display "ID". Select a unique ID number for the device (M, A, S, L, 01 to 09) by pressing the + or - button.
- In Repeater mode, available IDs are: M, A, L, 01 to 08. Press and hold the mode button to save the selected ID number.
3.5 Enable / Disable Listen-back Path
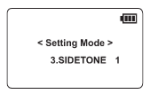
- Press and hold the mode button on the powered-on device until "Setting Mode" appears. Briefly press the mode button twice, after which SIDE TONE will appear in "Setting Mode".
- Select Side Tone OFF or set level 1 - 5 by pressing the + or - button. Press and hold the mode button to set the selected option for the listen-back path.
3.6 Microphone Sensitivity Level Selection
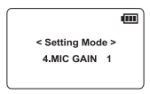
- Press and hold the mode button on the powered-on device until "Setting Mode" appears. Briefly press the mode button three times, after which MIC GAIN will appear in "Setting Mode".
- Select microphone sensitivity level 1 - 8 by pressing the + or - button.
- Press and hold the mode button to set the selected microphone sensitivity level.
3.7 Group Access Code (PIN) Selection
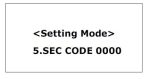
- Press and hold the mode button on the powered-on device until "Setting Mode" appears. Briefly press the mode button four times, and then SEC CODE will be displayed in "Setting Mode".
- The security code consists of four digits, and you can select 1 - 9, A, B, C, D, E, F for each digit by pressing the + or - button.
- Briefly press the mode button to change the next digit after setting one. Press and hold the mode button to set the selected security code.
3.8 Operating Mode Selection
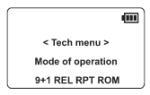
- To enter the "Tech menu", press and hold both the top button and the mode button simultaneously for 2 seconds while the device is powered on.
- The currently selected mode flashes. The selected mode flashes after switching to the preferred mode using the + or - button.
- A long press of the mode button will select the set mode and then power off the device.
- Turn the device on again, and the currently selected mode will appear in the lower right corner of the LCD display.
3.9 Explanation of Each of the 4 Available Operating Modes and IDs
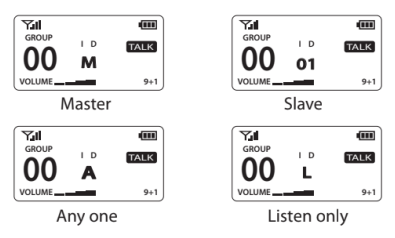
3.9.1 Mode: 9+1 – a mode enabling simultaneous conversations for 9 fixed users + 1 optional PTT
- ID#M; Master – Full hands-free conversation at the same time – only one ID number in the group.
- ID#01 - ID#08; Slave – Full hands-free conversation at the same time – only one ID number in the group.
- ID#A; Slave – Can receive the entire conversation in the group but must press and hold the top button (PTT) to speak (no limit on ID assignment).
- ID#L; Receive only (no limit on ID assignment).
Instead of 9 users + 1 PTT, if you want 10 designated people to have simultaneous conversations, you can set ID# A to ID# 09.
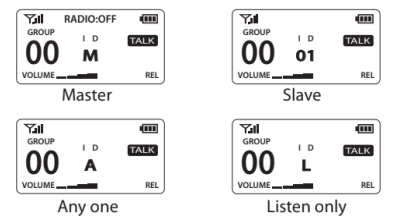
3.9.2 Mode: Relay Mode – a mode for sending and receiving long-distance conversations between any group via a connected two-way radio with RA-11U adapter (more information in the attached RA-11U user manual)
- ID#M; Master – Full hands-free conversation at the same time – only one ID number in the group.
- ID#01 - ID#08; Slave – Full hands-free conversation at the same time – only one ID number in the group.
- ID#A; Slave – Can receive the entire conversation in the group but must press and hold the top button (PTT) to speak (no limit on ID assignment; cannot communicate with other groups).
- ID#L; Receive only (no limit on ID assignment).
Instead of 9 users + 1 PTT, if you want 10 designated people to have simultaneous conversations, you can set ID# A to ID# 09.
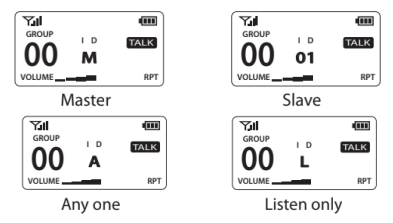
3.9.3 Mode: Repeater Mode – a communication mode that minimizes the impact of obstacles encountered by each user by relaying each user's conversations through an ideally located Master
- ID#M; Master – Full hands-free conversation at the same time – only one ID number in the group.
- ID#01 - ID#07; Slave – Full hands-free conversation at the same time – only one ID number in the group.
- ID#A; Slave – Can receive the entire conversation in the group but must press and hold the top button (PTT) to speak (no limit on ID assignment).
- ID#L; Receive only (no limit on ID assignment).
Instead of 8 users + 1 PTT, if you want 9 designated people to have simultaneous conversations, you can set ID# A to ID# 08.
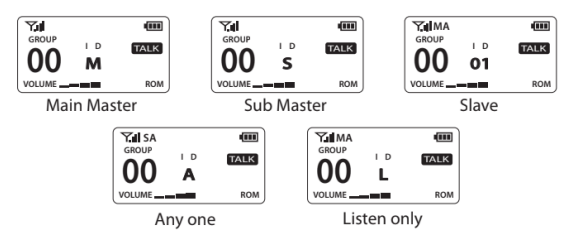
3.9.4 Mode: Roaming Mode – a method for increasing the communication distance between users by 1.5 to 2 times by mutually relaying calls between Master and Submaster devices
- ID#M; Main Master – Full hands-free conversation at the same time – only one ID number in the group.
- ID#S; Sub Master – Full hands-free conversation at the same time – only one ID number in the group.
- ID#01~ID#08; Slave – Full hands-free conversation at the same time – only one ID number in the group.
- ID#A; Slave – Can receive the entire conversation in the group but must press and hold the top button (PTT) to speak (no limit on ID assignment).
- ID#L; Receive only (no limit on ID assignment).
Instead of 9 users + 1 PTT, if you want 10 designated people to have simultaneous conversations, you can set ID# A to ID# 09.
Roaming Method Selection
- Press and hold the mode button until "Setting Mode" appears.
- Briefly press the mode button eight times until "6.ROAMING" appears on the display in "Setting Mode".
- Select the preferred roaming method using the "▲" or "▼" button and long-press the "Mode" button.
- AUTO: The device will automatically connect to the closer master (Main Master or Sub Master). The active connection is displayed as "MA" or "SA" on the OLED display.
- MANUAL: Allows you to manually select which master to connect the device to by pressing the mode button. The connected master is displayed as "MM" or "SM".
- MASTER: The device is always connected to the Main Master device. "ML" will appear on the display.
- SUB MASTER: The device is always connected to the Sub master device. "SL" will appear on the display.
4. Technical Specification
|
Parameter |
Value |
|---|---|
|
Dimensions |
122.7 x 23.5 / 31.0 (with clip) x 67 mm |
|
Weight |
180 g |
|
Frequency Band |
2407 MHz ~ 2476 MHz |
|
Modulation |
GFSK with FHSS |
|
Codec |
16 bit / 8 kHz |
|
Max. Output Power |
100 mW |
|
Receiver Sensitivity |
-95 dBm |
|
Buttons |
Panels: side (volume), front (power, talk, mode), top (talk, PTT). |
|
Sockets |
2x 4-pin 3.5 mm jack, Micro USB (charging and service). |
|
Latency |
< 180 ms (typical) |
|
Number of Available Channels |
40 channels (2.4 GHz version) |
|
Channel Spacing |
500 kHz |
|
Battery |
Li-ion 3.7 V / 2000 mA |
|
Antenna |
Detachable dipole antenna |
|
Transmission Range |
Up to 500 m (2.4 GHz version) |
|
Frequency Response |
50 Hz ~ 4 kHz |
|
Max. Number of Simultaneous Conversations |
10 conversations (including Master) |
|
Indicators |
OLED display: group, ID, volume, battery, operating mode, talk status. |
|
Battery Life |
Typically 12 hours |
|
Battery Charging Time |
3 to 5 hours |